- Continue Shopping
- Your Cart is Empty
What is beard oil?
Quick Tip: Beard oil is a conditioning product made of a mixture of base oils for conditioning and essential oils for scent, designed to keep your beard healthy and looking great.
What is beard oil?
You may be new to the world of beard products, you may consider yourself an old pro. But outside of knowing that beard oil can help your beard look and feel better while also keeping it healthier, have you stopped to ask yourself – what is beard oil? As a producer of beard and moustache products, CanYouHandlebar wants to make sure you’re informed about the products you’re using on your beard. You take the time to cultivate your beard, so it makes sense that you would want to take the time to learn a little more about what you put into it.
Beard oil supplements what your body naturally produces
Beard oil is a conditioning product, but if that statement doesn’t tell you enough, think of beard products as a topical supplement designed to give your beard the things it needs to stay healthy and looking great. Daily life or an employment situation that doesn’t expose your beard to the elements can still wear on your beard. Even washing your beard, which is something we recommend of course (with a proper beard soap), can remove some of the oils that keep your beard healthy. So we offer beard oils to help fill in those gaps.
We care about what goes into our beard oils, and you should too
When we first introduced our oils to the CanYouHandlebar community, we wrote: “The base oil was designed to help your beard look great and maintain its health. The aroma is made of high quality essential oils with no cheap fillers. The attention to detail extends to the labeling. Knowing that your beard oil will likely be stored in your bathroom where water and small amounts of oil will get onto the label, we spent a little extra and used water- and oil-proof labels! Your oil will look as good from the day it arrives until you've used the last drop!”
Our beard oils will keep your beard healthy and looking great
With all beard oils, the base oil blend provides the conditioning aspects that keep your beard healthy and help tame it. With a properly produced beard oil, the scent comes only from essential oils, no fragrance oils and certainly nothing that includes alcohol as an ingredient as alcohol can quickly dry out your beard. After applying our beard oil (see more information on How to Apply Beard Oil here), you should notice that your beard looks better and smells great (unless you choose Temperance, our unscented beard oil). While the scent will fade gently throughout the day, the conditioning will not. Our beard oils will keep your beard conditioned as you go throughout your day.
How to fix an uneven moustache
Quick tips: Start with a clean moustache, comb your moustache straight down to check evenness, trim if necessary, or work to adjust your styling technique.
One of the most common questions we receive from fellow growers of facial hair is “My moustache (or handlebar) is uneven how do I fix it?” We are not experts, but we have been around the block a few times, and here are a few tips we have learned that may help you along the way.
Start with a clean moustache, comb it straight down
Especially when considering uneven handlebars, you must make sure that it is your moustache that is uneven and not your styling technique. Start with a clean moustache, fresh out of the shower after a good wash with Every Day Beard Soap, apply the beard oil or beard dry oil of your choice and then use a flat iron (if your moustache is long enough) or hair dryer on a low heat setting, and moustache comb, and comb your moustache straight down. Don’t be afraid to make multiple passes to make sure your moustache is lying as flat as possible.
Check your moustache closely for evenness
Check your moustache closely in the mirror. Does it appear even? It may not look even all the way across, but you want the parts that are directly opposite each other to be the same length, so the outermost tips should be the same length, the innermost parts right above the split of your upper lip should be the same length, and so on. Should you decide that a trim is in order, do so judiciously and with caution, trimming even just millimeters at a time. Place a ruler or even a level flat across your moustache to help you gauge the evenness on the outermost points.
Style your moustache to check your work
Once you have trimmed, if that was necessary, take some time and use some Primary or Secondary wax and style your moustache as you normally would. However, a quick caveat; if you did use a beard oil or dry oil when straightening your moustache, take a moment to wash that out prior to styling. The extra oil can degrade the wax mixture and reduce the styling capabilities of the wax. However, don’t hesitate to utilize the flatiron or hairdryer here, to make sure the wax is evenly distributed through your moustache as an uneven amount could cause uneven handlebars. Check for evenness, repeat the early steps if necessary, or sit back and admire your handiwork.
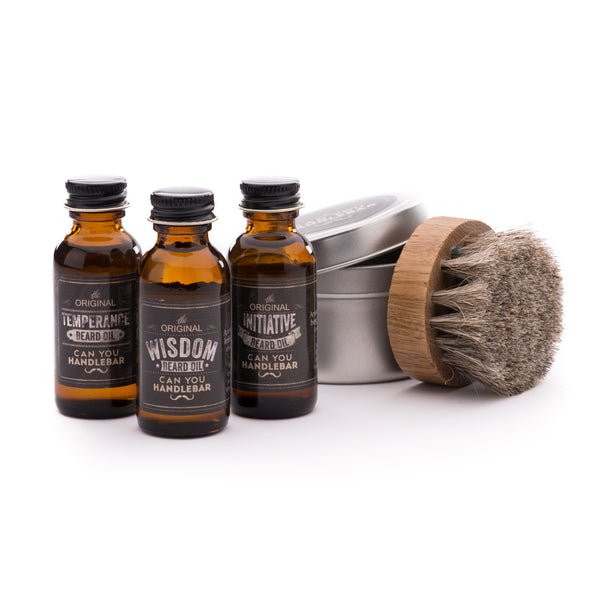
Introducing Beard Oils: Wisdom and Initiative
About Beard Oil:
Throughout the ages, across all peoples and religions, oil has been used in ceremonies to provide a physical symbol of what was happening at a deeper spiritual or relational level. The ritual of oiling one's beard is a great time to think about the deeper topics of life. The day is young and we are looking at ourselves in the eyes as we stand in front of the mirror. The CanYouHandlebar oils are meant to provide you some good thoughts to consider during these few moments while the day is still in front of you.
About Wisdom Beard Oil:
This oil is built around the warm scent of fresh cut spruce. It is warm and fresh but definitely masculine. The mental image I had in mind when I was mixing this oil was that of spending time with a patriarch on a porch, watching the sun come up and the dew evaporate off the ground as the day warms up.
About Initiative Oil:
This is a beard oil that inspires me to put in the hard work and the hours to build something worth having. This is a more brisk scent and is made from a stack of brisk citrus tones. It is a mature take on citrus. It was important to get the freshness of lime and bergamot without creating something cloying. I think I nailed it.
How do I apply this stuff?
Depending on the size of your beard, pour between a dime and quarter sized puddle into your hand and massage it into your beard. Wash hands or rub them on the dog. You can also use the beard brush, just try to keep the oil on the surface by holding the brush in an angle in your hand so all of the oil doesn't run down into the brush as much. If you go this route, go right side, left side, underside and then top so that you don't get oil on only part of your beard. Repeat if necessary.
Thoughtfully designed
The base oil was designed to help your beard look great and maintain its health. The aroma is made of high quality essential with no cheap fillers. The attention to detail extends to the labeling. Knowing that your beard oil will likely be stored in your bathroom where water and small amounts of oil will get onto the label, we spent a little extra and used water- and oil-proof labels! Your oil will look as good from the day it arrives until you've used the last drop!
Why Use Beard Oil
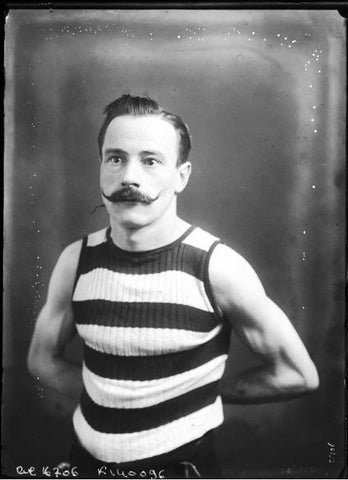
History of beards
When I tell people what I do I am often asked, “why does a person need a beard oil?” The reason may not be obvious at first. Until recently, mankind didn’t bathe everyday or so and the oils from our sweat made it into our beards and kept them looking pretty swell. These days we need to replace the oils we lose down the shower drain by adding good oils back to the hair every day or two.
Hair cannot be repaired
Having a beard can make a man feel very alive. However, strictly speaking, all of that hair is dead and despite what you might have heard you cannot repair damaged hair. All you can do is keep it from getting brittle and splitting to begin with. Hair that is well maintained will look good several years after it has left the follicle. Several of the guys I know with amazing beards recommend washing the hair with shampoo around once a week and using a conditioner.
Applying beard oil
After towel drying (avoid heat from hair dryers if possible), a little beard oil will make the beard look good, smell good and stay in good working order for years. A good beard oil brush will help get that oil all the way into the hair and massage the skin too. CanYouHandlebar offers a handsome and very useful beard oil brush!
How to properly apply moustache wax

Quick version of how to apply moustache wax
I spent some time today creating a guide for applying moustache wax.
- Pre-work: warming the wax
- Step One: admire the can
- Step Two: scrape some wax
- Step Three: transfer to finger tips
- Step Four: rub between fingers
- Step Five: confirm wax is melted
- Step Six: wax back of moustache
- Step Seven: wax rest of moustache
- Step Eight: wipe off excess wax
- Step Nine: confirm all is well
Moustache wax application under different scenarios
Touch ups:
In this picture I am just doing a “touch up” so I focused mostly on the ends of my handlebar moustache. In addition to touching up the tips, I occasionally add a little wax to the lip line before dinner to keep those hair out of my mouth and a dab for any fly aways. I basically trace the side of the moustache, starting in the middle and working my way out to the ends. The ends are where most of the wax is needed. The middle of the moustache doesn’t support or look good with a ton of wax because you are breathing out at ~98.6 degrees all day long and constantly melting anything you put there.
Fresh application:
When I have just taken a shower, I start with a totally dry moustache (oil and water don’t mix!) and put a light amount of wax in the center, working my way out and, as above, focus most of my attention on the tips. I like to use a hair dryer on low heat to ensure no wax clumps are visible and to make sure I am not dragging a comb through wax that at holding strength. If you pull a comb through wax that isn’t warmed you may pull out hair ahead of schedule. I recommend combing the freshly waxed hairs down first and then to the right and left. After the hairs are combed I gently twist the ends toward my face, using extra wax as necessary.
Under construction:
If your handlebar moustache is still in the growing phase, use more wax because it is training the hairs to grow the right direction, soothing the skin underneath that my be scratched by hairs as they grow out and it will help you resist the temptation to trim at the hairline and give yourself a mullet handlebar moustache. After three months, start using less wax in the middle (see above).
Emergency touch-up tips:
I live in Michigan and have had to apply or reapply wax under less that optimal conditions. Here are some tips and tricks for these emergency situations. In a vehicle: crank the heat up to high and use it to warm the wax and to blow onto your moustache after application to melt any clumps. I turn all vents “off” except for the one right in front of me to get maximum airflow on my face. Then I cup my hands to aim all of the air at my moustache. This is surprisingly effective.
Armpit:
Your armpit is the closest you can get to your body’s core temperature that isn’t illegal in some states. Putting your wax in your armpit for several minutes will soften it better than riding shotgun in your pants pocket (where I normally carry my Primary6)
Cup your hands:
If all else fails, you can use your own breath to soften the wax you’ve just applied. The trick is to breathe in through your nose and out through your mouth. Cover your mouth like you are sneezing and you will be exhaling nearly 99 degrees of heat to your moustache. After 10-15 breaths you can usually get a pretty decent outcome. Just pay close attention to clumps and use as little wax as possible to reduce the amount of wax as possible–the less you use, the less you have to try to warm with your own breath. The tips you can warm by rolling them back and forth with your thumb and forefinger.
For the full article click here.
The phases of growing a handlebar moustache

Knowing the phases upfront
The decision to grow a handlebar moustache can be made in a day; however, the work required to actually grow a handlebar to full maturity requires about three months (aka 90 days, 12 weeks, or a quarter of a year--whichever seems the shortest to you). If you know this you are ahead of the game and have the opportunity to prepare your mind and your face. Here are the phases and what you need to know for each.
Phase One: Stubble phase
This phase is the easy one. You may be a lucky would-be handlebar moustache wax wearer and already have some sort of goatee, a moustache or a full beard and moustache combo. If that is the case, skip to Phase Two. If you are converting your Movember growth to a manly handlebar, you have already gone through this and come out the other side with some growth. Here are some tips for this. Tip: 1. err on the side of not shaving hairs you may need later. 2. Use a natural coarse bristled brush to massage the skin and keep the skin on your lip healthy and free of dead skin and hairs that have bailed. 3. Start using your moustache wax to train the hairs to the sides and condition the hair underneath.
Phase Two: Itchy phase
This is when you will be tempted to trim at the lip line because it is itchy and starts to creep into your mouth. DON'T. You need these hairs later. The itchy phase is where most guys bail. Hang tight because this phase only lasts a couple weeks before the hairs are long enough to stay put when you comb them to the sides. Tips: 1. Use wax every day at this point. Use the least necessary to maintain the hold and protect your skin. 2. Use positive affirmations like "nothing worthwhile happens overnight" and then suck it up and stick it out to Phase Three.
Phase Three: Awesome phase
This is the big pay off. After around six to eight weeks you will have an adolescent handlebar moustache. The middle won't have grown all the way to the ends yet, but it will look like a fully fledged handlebar from a couple feet away. Buy the time you hit the three month mark--you are there! Congratulations! Tips: 1. Focus most of you wax in the tips since your nose is breathing out nearly 98 degrees and will soften the wax anyway. Since you are three months in, all of your hairs are growing alongside one another and so, if you get the tips waxed, the middle will largely take care of itself. Tips: 1. Focus on the tips. 2. Twist the tips gently toward your face not "out" since your head is sort of a sphere and you want the tips to hug your face, not point out like bull horns. 3. Help someone else by becoming a handlebar moustache mentor!
The basics: how to grow a handlebar moustache

The growth period of a handlebar moustache:
Many people ask me how long it takes to grow a respectable handlebar moustache. When I say, "about three months," I can see crests falling. There are a few points I would like to make about this. Just because your handlebar moustache is not fully mature early on, it doesn't mean it looks bad right up until day 90. In fact, it can look pretty decent all the way through the growing. During the growing period you may end up using a little extra wax to keep untrained hairs out of your mouth. Yes, I said untrained hairs. Unless you have had a handlebar for a while your moustache thinks it is "business as usual" and will grow is its natural pattern. It may surprise you that lip hair has a pattern, but just like the hairs on your beard or your head moustache hair has a preferred growth pattern. This three month growing period does two things. First, it allows the inner hair to catch up to the outer hairs. Second, the time period allows the wax to train the hair to go the direction you want it to grow.
Tricks during the growing period:
These are all optional but may make you feel more comfortable joining the handlebar moustache fraternity. Use what you like and ignore the rest.
Week One and Two:
Grow out a normal 90's goatee or a full beard. This lets you get some length without standing out too much. Prior to week two you really won't have enough hair to even begin waxing the ends. That said, a little moustache wax is handy even if you don't want to grow a handlebar. Some folks even use wax to keep fly-away eyebrows under control. Unless you are a fixture on 60 Minutes, you may want to get those eyebrows in check, too.Week Two through Six:
Now you are probably starting to feel whiskers you are used to trimming sneaking into your mouth or tickling your lips. Please resist the temptation to trim these hairs. You will need these later. During this period of growth you will want to keep your wax in your pocket to keep it near body temperature so you can get a dab and train these pesky hairs swept to the right and the left away from your meal.Week Six and beyond:
By now you should have sufficient hair on your upper lip to make the call to have only the handlebar moustache or keep your beard or goatee as sidecars to your awesome handlebar. There is no right or wrong about this. Some purists insist a handlebar should ride stag on your face, others are more lenient as to what constitutes a "real" handlebar moustache. I say do what you'd like and don't listen to the naysayers.Note:
Don't feel compelled to wash out all of the wax every day. When you shower, obviously you should clean up and keep everything hygienic, but you don't need to or want to scrub out all of the wax. First of all, this is nearly impossible to do because moustache wax is made predominantly of wax and oil and is tough to remove entirely without tough soaps like dish soap. Beyond that, this is not good for your skin, not necessary for hygiene and not conducive to training your hairs. Every night, the wax in your moustache provides free training the whole time you are out cold!The "dont's" of moustache growing:
Like the tricks, above, these are guidelines I am offering to you, man-to-man, not rules. Experiment and let me know if you find a better way!
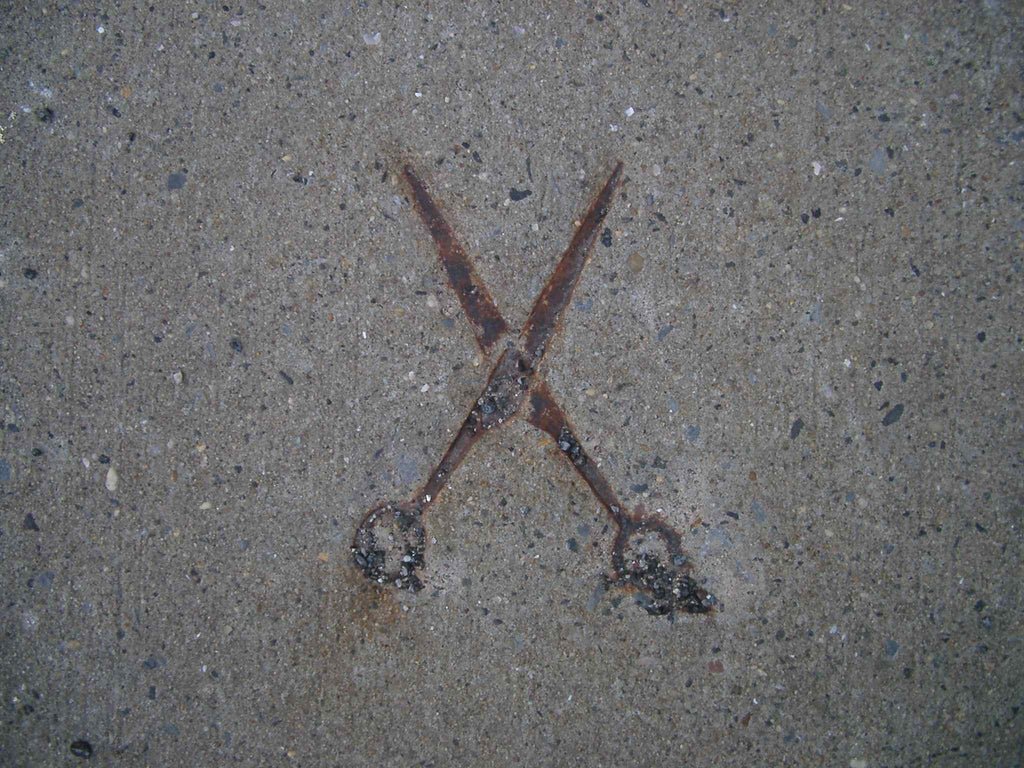
Trimming:
I advise that you give it two to three weeks before trimming any hairs. If a single hair is driving you nuts--guillotine it, but if you can bear it, let them all grow until you get a good idea of which hairs will play along and which ones need to go. I strongly advise against cutting the hairs directly above the lip (which you are used to cutting if you have a goatee now) because then you end up with a handlebar mullet! You want those hairs to grow out and meet the outer hairs in order to get that full and natural look. After a couple of weeks you will start to notice that some hairs just don't belong. I have a few that grow North of the main part of my moustache that just never blend in well, so I trim them with little, sharp sewing scissors. I also trim a few hairs right beneath my nose for the same reason.
Overnight training:
Now this may be controversial, but I noticed that sometimes not matter how much I fiddle with my handlebar or applied wax, the ends tended to curl out to make bull horns (and these do not look great and photograph even worse) or one handle would get bent the wrong way on my pillow as I slept, so I turned to extreme measures. I used a DIY moustache snood while sleeping for a few nights in a row. I went to the drug store and picked up, for a few bucks, a package of nylon stretchy headbands with the little rubber nubs and wore the bad around my moustache and then around the back of my head where that line is under the bump on the back of your skull. This wasn't too tight for me and is reportedly not amorous in nature, but gives you eight or so hours (while sleeping) of hard core moustache training when needed. I have only done this a couple times.
Dedicated comb:
If you are using wax, you will want a dedicated comb so that you don't get wax in the hair on your head when combing it. (This doesn't apply to me exactly, because I am bald on top and keep the remaining hair short.) You will find this accumulates wax, so run it under hot water and use some good dish soap (I like blue Dawn) and a badger haired brush or old tooth brush to clean up the residue here and there. Pro-tip: Blow brying your combs to melt the wax and then wiping on a paper towel may sound like a good idea but then your comb melts like one of Dali's clocks and that will not help you grow Dali's moustache!
Hairs fall out--no biggie:
Hairs will fall out and though it can feel like a setback when you have been spending so much time and energy to get long curled hairs, know that it is normal. One caveat: if your moustache has a heavier coating of wax on it, don't pull a comb through at room temperature because in this specific scenario you may actually be pulling some "live" hairs clean out of their socket due to friction. I recommend cupping your hands and breathing that deep warm lung air into your moustache before combing or passing a blow dryer on low heat over your moustache a few times to soften the wax before combing. This is especially true of stiffer waxes.
Information
Products
As featured:


News & Updates
Subscribe to our non-annoying (about once a month) newsletter where I will let you know what is new, pass on a coupon here and there and share cool things I've found across the web.