- Continue Shopping
- Your Cart is Empty
How to properly prepare moustache wax for use

Quick tips: Warm your wax, both prior to and during use, and don't be afraid to take advantage of multiple heat sources.
Moustache wax is an excellent tool to help keep your moustache styled, and even conditioned if you use the proper wax. Just as a true handlebar moustache starts in the middle, an effective use of moustache wax starts with a thoughtful preparation of your chosen wax. As a producer of beard and moustache products, CanYouHandlebar wants to make sure you’re informed about the products you’re using on your facial hair. You take the time to cultivate it, so it makes sense that you would want to take the time to learn a little more about what you put into it, and the proper ways in which to do that.
Warm your wax
The name of the game is warmth. As you’ll notice when opening your tin of Primary or Secondary, the wax is rather firm in the tin. You can scrape some of the wax out with a thumbnail, or use one of our wax lifters for a less messy application. However, there are some considerations you should take into account before you reach this step. You want the wax to be warm prior to application. This will allow for easier removal and application.
Don't be afraid to experiment with warming methods to see which one suits you best
You can accomplish warming your wax in a number of different ways. 1) Place the tin of wax in your front pants pocket for a while as you go about your normal activities. Your natural body heat will warm the wax a bit; 2) Give your wax a bath. Put the entire tin (lid on) in a sink or mug full of hot water for a few minutes. We made our labels oilproof and waterproof for occasions just like this; 3) Aim a hairdryer at the wax (lid on or off) and hit it with heat for a few minutes; 4) Scrape out an amount of wax and use your thumb and forefinger to roll it into a ball, then place your thumb and forefinger in your mouth as though you were going to use them to whistle, and use exhaling to warm the wax. Just be careful to inhale through your nose and not your mouth as that could cause you to swallow the ball of wax.
Continue warming through application for smooth and even results.
There are certainly a number of other methods that work, but these are the ones we have found to be the most effective and easiest to accomplish. Remember that the wax will continue to cool as long as it’s not exposed to a heat source, so be prepared to use a hairdryer on a low heat setting, or mini-flat iron, as you work the wax into and through your moustache for a smooth, even application. Proper preparation of your wax will save you time and get you the best looking results.
Primary vs. Secondary
Quick tips: Primary moustache wax has a medium hold and is great for daily use. Secondary is a firmer wax perfect for more aggressive hold and styles.
One of the most common questions we hear is "Should I use Primary or Secondary Moustache Wax?" We appreciate customers wanting to make an informed choice - we're happy with the quality of our products and we want you to be confident in, and happy with, your purchase. Feel free to peruse this brief explanation of the differences between our moustache waxes, and contact us with any questions.
A thoughtful recipe
We have nothing to hide with our moustache wax. Our ingredients always have been, and always will be, printed on the label for you to see. Both of our waxes contain local (Michigan) beeswax, lanolin, castor oil, coconut oil, shea butter, and Vitamin E. After much experimentation, this is the combination of ingredients that we came up with to best style your moustache while being conscious of your facial hair's health as well. The same care that went into crafting the final recipe also went into the design and materials of our labels. Like with our traditional beard oils and Beard Dry Oil, the labels on our tins of moustache wax are oil proof and water proof.
Primary
In our description of our Primary Moustache Wax, we ask the question "Are you a laid back gentleman that would prefer to encourage your hairs rather than resort to force?" If so, this is your wax. Primary wax is a medium hold wax that is great for daily use. As we discussed in How to grow a handlebar moustache, training your moustache is an important part of the handlebar process. Primary is an excellent product to train your moustache, not only to shape a handlebar but also to encourage your moustache to lay the way you'd like, whether that be for the simple purpose of keeping it out of your mouth during the day or to help you cultivate your own moustache style. However, as Primary is a medium hold wax, it does allow users to craft more aggressive stylings that will hold up throughout the day.
Secondary
Our Secondary Moustache Wax is simply, "a firmer wax". If you are looking for a moustache wax that will allow you to craft the most detailed of stylings and keep it in place throughout the day and night, this is the wax for you. While Secondary was not designed with competitive facial hair events in mind, it has shone through as an ideal wax for competitive purposes; one that allows you to style your moustache and keep it in place throughout the rigors of competition as the night goes on. You'll notice that Secondary is firmer in the tin than Primary and thus requires more heat to make the wax malleable, but the application process is still straightforward and easy to do with some practice and the aid of simple tools like our wax lifters, Kent Moustache Comb, and a flat iron and/or a hair dryer on a low heat setting.
Don't be afraid to use wax on a daily basis
Regardless of whether you choose to use Primary or Secondary, don't be afraid to use moustache wax on a daily basis, especially if you are training your moustache. Knowing how to effectively use moustache wax is an important step in making sure that your moustache always looks its best. We designed our wax with daily use in mind, not just in the wax itself, but even in the tins themselves. Our tins have a slim profile that fits easily in even the smallest of pockets, making it a perfect addition to your every day carry. While you may not need to reapply moustache wax throughout the day, it is always handy to have on your person in case you need a touch up. Still haven't been able to decide which you would like? No problem; take advantage of our discounted Get A Pair package. Keep in mind, while we have been discussing the differences, Primary and Secondary work well in concert with each other. There are a number of customers who use Primary to wax the middle hairs of their moustache and then use secondary for the curls in a handlebar and other styles that may require more hold. Good luck, and happy waxing!
How to grow a handlebar moustache

Quick tips: Be aware of your genetics, be patient, remember a true handlebar moustache starts in the middle, and start training your moustache early.
One of the most common questions we get is “how can I grow a handlebar moustache?” While a great handlebar cannot simply be grown on advice alone, we would like to offer you a few tips as you set out on your manly quest. Remember that your ability to grow a moustache will depend somewhat on genetics, and your own facial hair coverage. If you have grown a moustache before you should have some idea about whether or not a handlebar is in your future. If you haven’t attempted to grow a moustache before, take a moment to commend yourself on this most manly of pursuits. Then, sit back and wait. It will likely take you a few months of uninterrupted growth before you realize your moustache’s true potential.A true handlebar starts in the middle
Uninterrupted simply means no trimming. As your moustache starts to grow, you will soon find that it starts to hang over your upper lip – embrace this and resist the urge to trim. A true handlebar moustache starts in the middle and all of the hairs are swept towards the edges of your lips to form the handlebars. Some growers trim the middle section of their moustache but leave the sides long to style them into handlebars. While this may generate a similar effect, it is not a true handlebar and can sometimes produce an awkward looking moustache. Instead of trimming, take the time to train your moustache.Train your moustache
Training can come in a number of different ways. (Cue Rocky theme music and training montage.) One of the easiest ways, once your moustache gets a little length, is to comb your moustache every day. Use a comb meant for moustaches like our Kent Moustache Comb. Starting at the crease right above your upper lip, comb your moustache out towards the edges of your lips. Do one side, then the other, repeat, and do this every day. The repetitive motion will train your hairs to lie that way. You shouldn’t expect your moustache to stay that way once you’re finished combing as the hairs will be tempted to fall towards their natural laying pattern, but this repetitive motion will help you give the hairs a new laying pattern. You should also find this helps keep your moustache out of your mouth which will further help you resist the urge to trim. You can enhance the effects of this training with some of our Primary moustache wax. This will keep the hairs in place once combed and work to speed up giving the hairs a new laying pattern.Beards and moustaches grow at different rates
If you are growing your moustache in concert with a beard, remember that despite being connected, your moustache and your beard will likely grow at different rates, and for those who have particularly dense facial hair, remember that when you are training and styling your moustache, you are training and styling your moustache, not your beard. When your moustache is long enough to style into a full handlebar, resist the temptation to include some of your beard hairs in the styling to make your moustache appear longer. According to the World Beard and Moustache Association, hairs more than two centimeters past the edge of your lips are considered part of your beard. Granted, that rule is more for competition purposes than anything else, but it’s an easy guideline to follow. Regardless, don’t get frustrated if your moustache doesn’t seem to grow as quickly as your beard. Most men’s don’t, and it doesn’t mean your moustache won’t eventually have some length.Remember your training
Finally, once your moustache has gotten long enough to style, after taking another moment to commend yourself for making it this far - remember your training. But now, instead of just sweeping the hairs out from the center of your lip, add in a step of using the moustache comb to help curl up the ends of the moustache to begin shaping your handlebar. This can also be accomplished with a flat iron or small curling iron, but be sure not to singe your moustache – you don’t want to damage what you have spent such a long time cultivating. Continue to use our Primary wax, or for more aggressive and longer lasting styles, pick up a tin of our Secondary. If you’re wanting to try both, take advantage of our discounted “Get a Pair”. Good luck, and happy growing!How to fix an uneven moustache
Quick tips: Start with a clean moustache, comb your moustache straight down to check evenness, trim if necessary, or work to adjust your styling technique.
One of the most common questions we receive from fellow growers of facial hair is “My moustache (or handlebar) is uneven how do I fix it?” We are not experts, but we have been around the block a few times, and here are a few tips we have learned that may help you along the way.
Start with a clean moustache, comb it straight down
Especially when considering uneven handlebars, you must make sure that it is your moustache that is uneven and not your styling technique. Start with a clean moustache, fresh out of the shower after a good wash with Every Day Beard Soap, apply the beard oil or beard dry oil of your choice and then use a flat iron (if your moustache is long enough) or hair dryer on a low heat setting, and moustache comb, and comb your moustache straight down. Don’t be afraid to make multiple passes to make sure your moustache is lying as flat as possible.
Check your moustache closely for evenness
Check your moustache closely in the mirror. Does it appear even? It may not look even all the way across, but you want the parts that are directly opposite each other to be the same length, so the outermost tips should be the same length, the innermost parts right above the split of your upper lip should be the same length, and so on. Should you decide that a trim is in order, do so judiciously and with caution, trimming even just millimeters at a time. Place a ruler or even a level flat across your moustache to help you gauge the evenness on the outermost points.
Style your moustache to check your work
Once you have trimmed, if that was necessary, take some time and use some Primary or Secondary wax and style your moustache as you normally would. However, a quick caveat; if you did use a beard oil or dry oil when straightening your moustache, take a moment to wash that out prior to styling. The extra oil can degrade the wax mixture and reduce the styling capabilities of the wax. However, don’t hesitate to utilize the flatiron or hairdryer here, to make sure the wax is evenly distributed through your moustache as an uneven amount could cause uneven handlebars. Check for evenness, repeat the early steps if necessary, or sit back and admire your handiwork.
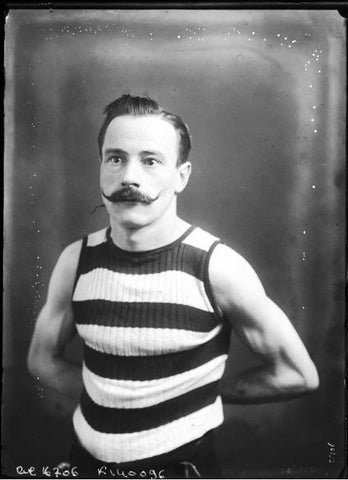
Getting back into growing a moustache

The Handlebar (Moustache) Club / LONDON / 07-03-2013 www.eduardoeduardo.com/
Building back a solid moustache
Sometimes life gets in the way of a perfectly good moustache. Be it military service, an ultimatum from a lady, or the curious hands of a toddler that uses your facial hair as a walking aid, from time time time, a moustache must be abandoned for a season. This post if specifically for those looking to get back into the game.
Switching from tube wax:
The tube stuff works a little different than a real beeswax based wax like mine. Tube "wax" is sort of a glue and it has some real vocabulary building ingredients. The reason it works is that it dries out allowing the product to set. The upside to this style is that it is easier to put in. The downsides are that once it is in it cannot be adjusted without adding more product. In this way, it is sort of like hair gel. Many guys end up with clumps where the "wax" isn;t combed through sufficiently. This isn't to say that this sort of product is "bad," it is just that real beeswax based moustache wax is generally a better and safer option.
What real moustache wax is like:
My wax is the real deal and the firmness is achieved when the wax cools off to room temperature. Since it never totally hardens it can be reformed throughout the day. In this weather, you can form your curls in the bathroom and then stick your head out the back door for 15 seconds and it will set up just right.
Tips for application:
As for tips, be sure to warm the can in your pocket or under the hot water tap for a bit until it can be scraped easily with the back of your thumbnail. them rub it between your thumb and forefinger and apply from the inside to the outside. A moustache comb is worth its weight in gold. The tines on the comb are close together to remove clumps and keep it looking sharp without any streaks of clumped together hairs.
Getting started:
If you can spare the cash, grab a pair of my waxes and a comb. You'll not be disappointed. Primary is a great everyday wax and Secondary is for tight curls at the end or for a night out when you want a strong hold. Now that secondary takes a little more effort to apply, but when you want maximum hold, you'll find the effort worth it. Here's a couple links that may help. First, get a pair of waxes [$19] and a comb [$10]. Then check out these videos.
In conclusion:
Having a moustache or beard is a pretty cheap hobby (about $30 to buy the whole kit and caboodle) that brings a lot of guys a lot of joy. It may not bring in buckets of money or solve world hunger, but there is an appeal to growing out facial hair. Maybe it is the chance to be both an individual and still be part of a tradition that goes back to the first caveman. In any event, with a little practice and patience you'll have a pretty admirable moustache gracing your upper lip and if you are like a lot of my customers a real sense of satisfaction. I wish you luck and invite any further questions as [email protected].
CanYouHandlebar Kent Moustache and Beard Combs
About our Kent combs
Pedigree
Legitimately better than the rest
Should I get Beard Dry Oil or Traditional Beard oils?
Taking care of a beard is like taking the tire off a bicycle.
When I was about eight years old I decided my bike wheel needed to come off so I flipped my bike upside down and attacked the nuts that held the wheel to the frame with a Crescent wrench and a hammer because the threads were too tight for my little sausage fingers. My dad noticed what I was about to do but couldn't stop me in time. I managed to practically weld the nut to the shaft by cross threading it something fierce. What I learned was any time it occurred to me to grab a hammer to finish a job, I should probably also ask for some advice. (By the way, I was without a bike for a whole summer as a result of my "creative" approach to bike repair!).
Use the right tool for the job.
Suffice to say, I am now a big fan of using the right tool for the job. It helps if you have a good toolkit. For beards, this means having a traditional beard oil and a beard balm of some sort. My beard balm is called "Beard Dry Oil." It is also a good idea to have a high quality beard comb, a brush for shaping your beard and a Beard Oil Brush for application. With these tools, you are ready for anything. That said, you may not need everything at once. Since I have a year old beard and use both a traditional oil as well as Dry Oil. If you are buying a gift or want to know what to start with, here are some tips for picking the right product.
For shorter beards (or for more control)
In general, a Beard Dry Oil is best for beards younger than a couple months or for when you want a little more control. A beard balm style oil adds a little volume and really helps control "fly aways." In particular I use Beard Dry Oil for my sideburns or whenever I have slept on my beard and I have a bad case of "bed beard," or whenever I just want to have a sculpted look like Santa had in A Miracle of 34th Street. The way Beard Dry Oil works is that it contains a little beeswax and lanolin and provides a little structure. While it is mainly designed for shorter beards and touch-ups, it can be used as a daily oil, even on longer beards. Case in point, Brian Furby the beard expert from the beard and moustache product review site TitleBeard has a year old beard (aka "Yeard") and uses Dry Oil daily. He likes it because it provides the control he desires.
For longer beards (or for for shine without hold)
As my beard has gotten longer, I have come to really appreciate traditional liquid beard oils. These oils provide great hair health properties, add a really nice shine to my beard and smell awesome. Most folks I talk to with more than a few months growth prefer liquid oils because the Beard Dry Oil can weigh down longer beards if that is all that is used. Some guys like to use Beard Dry Oil and traditional oils together for maximum control over the way their beard behaves since they can use as much of each type of oil as they like. There really isn't a right or wrong when it comes to beard oils, just what works best for your beard and how your beard is behaving on a given day.
Getting the right tool for your beard!
Like I mentioned earlier, it is good to have the right tools for the job! My guess is that curiosity will get the best of you and you'll want both eventually. If you buy both at the same time you save on shipping! :} The good news is that the Beard Oil Brush works great with either type of oil. You can buy just about any combination of beard care kit that you want, including getting a Beard Oil Brush, a Beard Dry Oil and Traditional Oil by using the pull-down option on that product page. Now, you'll be ready for anything!
Repairing a handlebar that won't stay together

Repairing a handlebar that won't stay together
A customer wrote in and asked about ways to prevent a handlebar from splitting apart at the curls. I have meant to write an article about this for a while now. These are the techniques that have helped me out a lot in my handlebar moustache journey. Ahhh, repairing the split in the moustache. The snakes-tongue, as I call it. The best way I have dealt with this is some combination of the following:
Mini flatiron.
About $25 on Amazon. I let it heat up for 5 minutes while I am oiling my beard, checking for errant nose hairs or trying to find the dime that rolled off the counter under the cabinet. Anyway, this flatiron (used VERY carefully, so as no to burn you or char your moustache) is a wonder product. It brings all of the hairs to the same angle from whatever their natural growth patterns was. A pro-level variant on ironing is to compress the hairs (again, carefully) between the paddles and then turn my wrist to around 90 degrees so that the ends of the handlebar turn up and then gently pull the iron towards the tips, away from my nose. This puts a gentle curl to the hairs like scissors to ribbons, if you will. It is better to take many quick passes at your moustache than to try to pressure cook those hairs. I have done this scores of times without incident but it is possible to burn those hair right off if you forget you are flat-ironing your moustache and start watching a Breaking Bad marathon.
Too much / too little wax:
Wax is sorta like fuel in an aircraft. Too much and it is too heavy and crashes. Too little and you run out and it crashes. The good news is, no one dies when you are figuring this out. I mean, that is really good news. If people died manicuring their handlebar, the liability policy I could have to take out would bankrupt me. Try altering quantities and journal the results. I am kidding about the journal. Actually, that would be interesting to read. So, journal. Then please share it. Include flowery language like they did back in the Civil War era too, please.
Moustache comb.
Not "a comb I use on my moustache," but a bona fide (please note use of fancy Latin--that means I am serious) moustache comb. Preferably from Kent. Preferably purchased on CanYouHandlebar.com (link). Here is why: the teeth are super fine, so they separate the warring factions of the snake tongue into discrete hairs and coerce them into playing nicely with one another. Regular ol' black grandpa combs (of which I have owned dozens) were "ok" but no great shakes for wax distribution. Ideally, each hair should have a super thin coat of wax and should gently touch the hair next to it like a pack of youth group kids in inner-tubes going around the bend of a slow river.
Occasional trimming.
When my handlebar gets super long, then my gravity defying feats begin to falter. This is not a recommendation, just something I have done on occasion.
"Manly Marks: A Letterpress Project" review
Manly Marks: A Letterpress Project
"Manly Marks: a Letterpress Project" is a very cool idea and there are 5 days left, so if you want a really cool and totally unique memento of your journey--follow the link and order yours! In addition to a handmade book there are other cool items at different award levels.
As many of you know, I love entrepreneurs and well made things. Brandon is a printmaker and has assembled a really cool hand made book about being a man. In his video, Brandon mentions the merits of the beard and so I am happy to announce that I am giving some beard Dry Oil to some of the backers of one of the coolest Kickstarter projects I have ever seen once the campaign has wrapped up!
Of course you know page three should be "apply Dry Oil to your beard." :}
(Disclaimer: I make nothing if you sponsor the project).
How to properly apply moustache wax

Quick version of how to apply moustache wax
I spent some time today creating a guide for applying moustache wax.
- Pre-work: warming the wax
- Step One: admire the can
- Step Two: scrape some wax
- Step Three: transfer to finger tips
- Step Four: rub between fingers
- Step Five: confirm wax is melted
- Step Six: wax back of moustache
- Step Seven: wax rest of moustache
- Step Eight: wipe off excess wax
- Step Nine: confirm all is well
Moustache wax application under different scenarios
Touch ups:
In this picture I am just doing a “touch up” so I focused mostly on the ends of my handlebar moustache. In addition to touching up the tips, I occasionally add a little wax to the lip line before dinner to keep those hair out of my mouth and a dab for any fly aways. I basically trace the side of the moustache, starting in the middle and working my way out to the ends. The ends are where most of the wax is needed. The middle of the moustache doesn’t support or look good with a ton of wax because you are breathing out at ~98.6 degrees all day long and constantly melting anything you put there.
Fresh application:
When I have just taken a shower, I start with a totally dry moustache (oil and water don’t mix!) and put a light amount of wax in the center, working my way out and, as above, focus most of my attention on the tips. I like to use a hair dryer on low heat to ensure no wax clumps are visible and to make sure I am not dragging a comb through wax that at holding strength. If you pull a comb through wax that isn’t warmed you may pull out hair ahead of schedule. I recommend combing the freshly waxed hairs down first and then to the right and left. After the hairs are combed I gently twist the ends toward my face, using extra wax as necessary.
Under construction:
If your handlebar moustache is still in the growing phase, use more wax because it is training the hairs to grow the right direction, soothing the skin underneath that my be scratched by hairs as they grow out and it will help you resist the temptation to trim at the hairline and give yourself a mullet handlebar moustache. After three months, start using less wax in the middle (see above).
Emergency touch-up tips:
I live in Michigan and have had to apply or reapply wax under less that optimal conditions. Here are some tips and tricks for these emergency situations. In a vehicle: crank the heat up to high and use it to warm the wax and to blow onto your moustache after application to melt any clumps. I turn all vents “off” except for the one right in front of me to get maximum airflow on my face. Then I cup my hands to aim all of the air at my moustache. This is surprisingly effective.
Armpit:
Your armpit is the closest you can get to your body’s core temperature that isn’t illegal in some states. Putting your wax in your armpit for several minutes will soften it better than riding shotgun in your pants pocket (where I normally carry my Primary6)
Cup your hands:
If all else fails, you can use your own breath to soften the wax you’ve just applied. The trick is to breathe in through your nose and out through your mouth. Cover your mouth like you are sneezing and you will be exhaling nearly 99 degrees of heat to your moustache. After 10-15 breaths you can usually get a pretty decent outcome. Just pay close attention to clumps and use as little wax as possible to reduce the amount of wax as possible–the less you use, the less you have to try to warm with your own breath. The tips you can warm by rolling them back and forth with your thumb and forefinger.
For the full article click here.
Information
Products
As featured:


News & Updates
Subscribe to our non-annoying (about once a month) newsletter where I will let you know what is new, pass on a coupon here and there and share cool things I've found across the web.